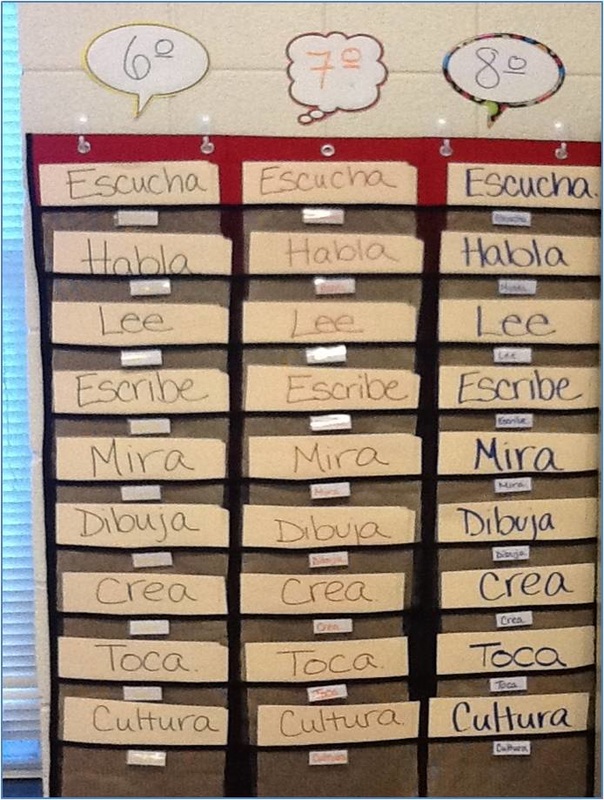
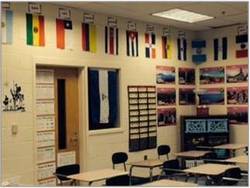
 This is one of my favorite things, and all you need is a pocket chart and a bunch of folders. The basic idea is that each folder is labeled with a target skill, and inside each folder is an activity. The students are required to do a certain number of activities per unit, but they DO NOT have to do all of them...hence the choice part of "Student Choice Boards". If you're already freaked out, don't worry, I'll explain the whole process... The Activities The activities should be directly related to your "I Can" statements and should practice a target skill. My boards are divided into: Escucha, Lee, Habla, Escribe, Mira, Toca, Crea, Dibuja, and Cultura. There are 9 because the pocket chart I bought at Walmart had 9 pockets. It wasn't a magic number. The activities should be things they can do in the down time after they finish any in-class work, although sometimes I do a few things they can do at home. With this, there is no reason to have students with nothing to do because they always have choice boards! 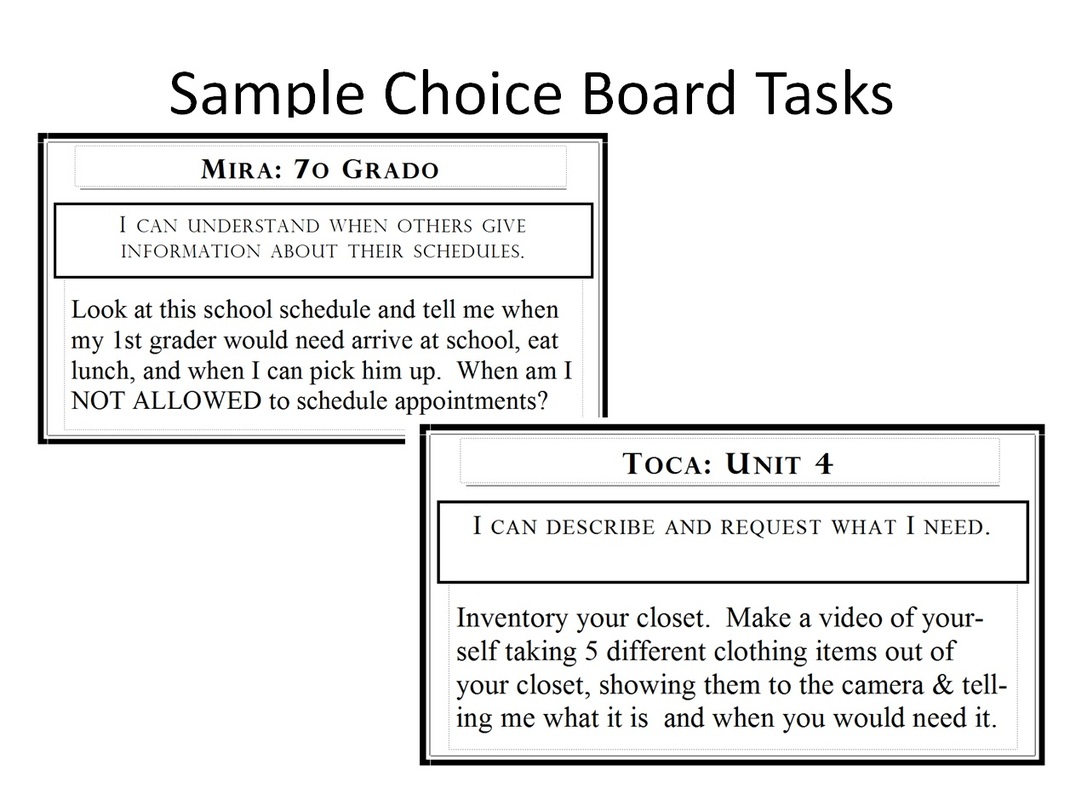 The Process My students know that they have to do 7 choice boards per unit. Typically, there is a rush on the choice boards the first day and they all take pictures of every activity and decide later which ones to do. On the right side of the folder I have the task. I make it business card size and repeated so that my students who don't have technology can just tear off one of the cards. As I said, most kids just take pictures of what the need. 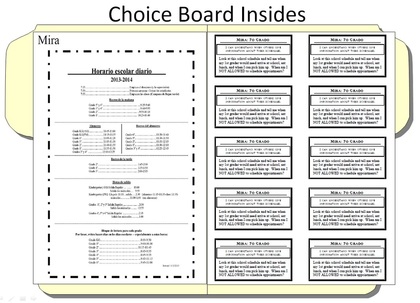 On the left side I put the additional resource needed to do the activity. In this case, it's a school schedule. In other cases it's a link to a video or song or simply my Google Voice phone number. Sometimes there's no left side at all, because it's a writing task or something that doesn't need additional materials. The Grading I put Unit 1 CB 1, U1 CB 2, U1 CB 3 etc. into the grade book at the beginning of each unit and leave them blank. You can't name them the skill in your grade book because not every child is going to do every skill. I tell the kids to make sure they have the title, the date and which number it is for them on the paper they turn in. That way I know which one it is, and they are responsible for keeping track as well. I mark it for effort/completion not accuracy because it's practice of the skill, and put it in the book as a running total. At the end of the Unit, I put zeros for all the ones they didn't turn in, and their grade is affected accordingly. Multiple Preps v. One Prep If you have multiple preps, you can use each column as one prep and they can choose 7 of 9 activities to do in their column. The picture at the top shows this option, with a column for 6th, 7th and 8th grades. I strongly recommend color-coding the folders (or the labels on the folders) so that the kids know which column is for them. If you only have 1 prep, your life is awesome, and you can do choice AND differentiation with this tool. The administration likes differentiation. :) Last semester the three columns were all for SPA I only, so I divided it up like ski runs and had green circles, blue squares, and black diamonds to show the levels of difficulty. The kids still only had to do 7 of 9, but this time they had to do AT LEAST 1 from each column. By requiring that, I knew that all the students were challenging themselves at least a little bit, and the more high-flying kids could do harder work if they chose. Exam Review
Once you get to the end of your semester or year, you can make a "best of" version of choice board activities for your review week. You could create new activities for them to do, but at the end of the year that seems like a lot of work. Personally, I just mix up the ones from the previous units and use them as in-class activities at stations or for independent work while I work with small groups or individuals. My students are doing mix-it-up choice boards for the two days while I do individual speaking tests. It really helps me, because they don't need me to do choice boards, so I can get through the speaking tests with minimal interruption. Hope this helps! Happy creating!
3 Comments
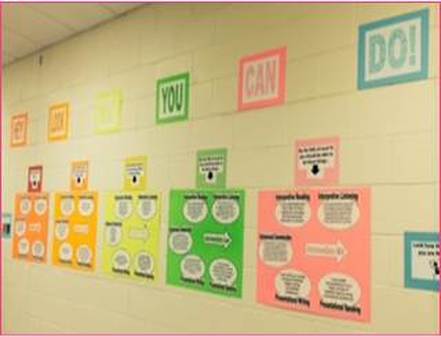 I have a set of color-coded proficiency posters in the hallway outside my classroom, and also inside on the wall underneath my whiteboard. I use them constantly as reference for myself and my students, and they serve as a reminder of our purpose in the classroom. My purpose is to give them the tools they need to increase their proficiency level, and the first step on that journey is understanding what proficiency means, what the levels are, and how they can improve. So where do we start?  You start at the beginning, at Novice Low, and work your way out of there as quickly as possible! Novice Low is basically word-level repetition and copying...that's no way to live... 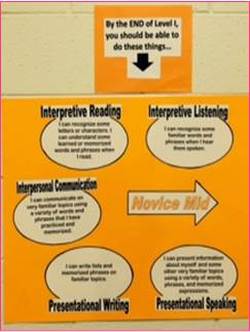 By the end of Level I according to North Carolina, your students should be comfortably in Novice Mid. They can do better...I promise...but they need to know what they're striving for. 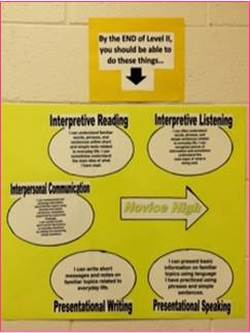 Novice High is the next step. That's where they should be after Level II, all they need to enter the university system here. They still can't survive in the language, but in Novice High, you start to get glimpses of language they are actually CREATING. They can do some Intermediate things, just not all the time. Now, before this becomes a dissertation on proficiency levels themselves, let me share why, for me, these posters are so key. When I grade their speaking and writing with a proficiency-based rubric, I sit right in front of my posters so I can easily reference where they are in each skill I am evaluating. When I talk to them about their work as a class, I have them evaluate their own work based on the posters on the front wall. When we discuss their unit final projects 1-on-1, we sit together in front of the posters and figure out where they are. Having these posters up has really been a big step towards holding them accountable for their proficiency level. To create them... I bought a pack of multi-colored neon poster board and cut out the arrows, colored the level-word the same color as the poster board and then arranged the arrow and the bubbles and titles in the way you see in all the pictures. The media specialist at my school laminated them all for me and then I put them up with hot glue on my cement block walls. To get you started, here are PDFs of all the different level bubbles that I have made (NL-AL) and the arrows as well. Proficiency Poster Resources
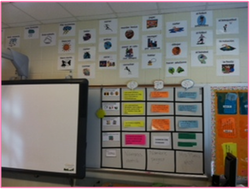
My room has 8 corners. I've started telling them they're inside the octagon when they come to Spanish. They laugh and tell me I'm dumb. We play 8 corners in class and they laugh some more and say "that's not how you do it, Mrs. Rhodes! It's 4 corners!!". I guess it's good that I'm not sensitive about them laughing at me anymore. Regardless, the 8 corners of my room have turned into 8 cornerstone places that make my teaching function. My kids are trained to look to the different places for different things that they need, and I wouldn't be able to teach without my octagon....just a warning, the 7th & 8th corners are my "I Can" statements/Proficiency area, and my Student Choice Boards, and those are on the blog in another whole post. Corner 1: Nuestra Vida  I have this wall posted in my room and I keep it there the entire year. It has everything I need to reference to explain to anyone how and why my room runs the way it does. It also is a great reminder to the kids when I walk over to it and say "Now, which thing are we breaking right now?" and they can tell me and we move forward from there. My Commitments This is what I offer to them at the beginning of the year to set the tone of safety and belonging in the classroom and to show that a classroom is a relationship. I start by making promises to them. My Expectations These are my “Be” statements and they explain how I expect them to act and work and play in my class in order to be successful. My Policies My policies are things that I care about (or my building cares about) and that I am willing to enforce every time for the whole year. My Consequences My consequences match the discipline process in my building and are consequences that I can and will enforce every time. Corner 2: Agenda 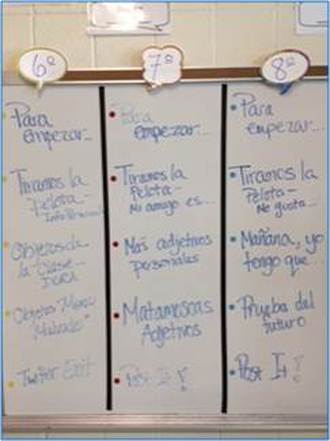 The agenda is not, as I used to believe, an annoyance that you have to post every day to keep admin off your back. It is actually really important for you, your students, and any walk-through administrators. It is a concrete way for everyone to be on the same page in your classroom. It keeps you on track with what you are planning to teach that day. It also holds you accountable to the I Can statements because when you write out the activities, you can see if/how they support your daily goals, or if you're just trying to fill time...not that we ever do that... It also helps those students who need structure to know what is coming next, and shows others the games you have planned later as incentive to get through your teaching now. Corner 3: Daily Slide & Supply Station 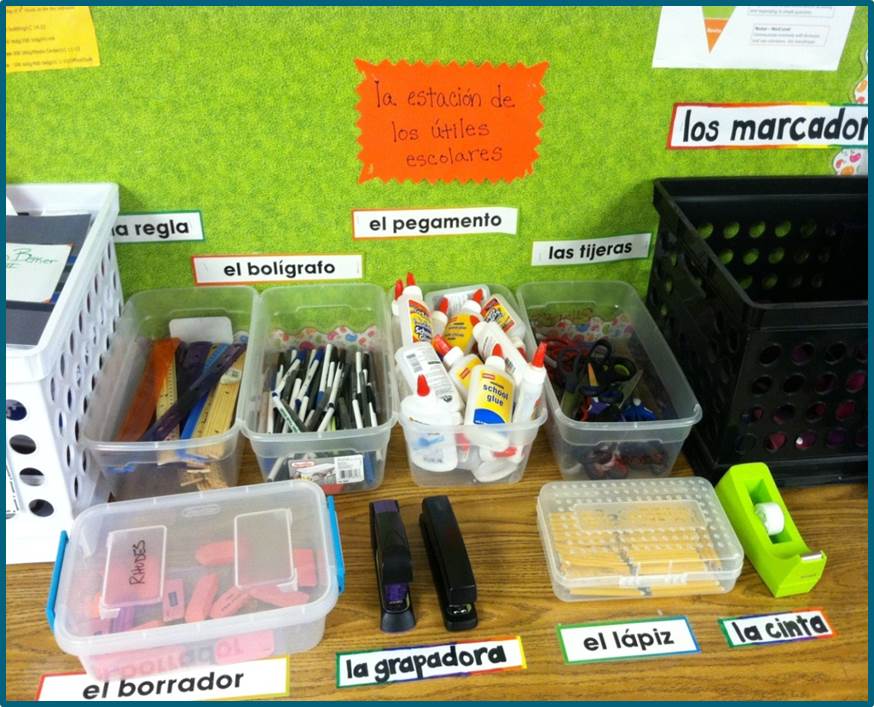 The Daily Slide and Supply Station form the basis for your entrance routine. I can't stress enough how much this has helped me with the procedural flow of my class. You create the Daily Slide, and on it, you have the date in the target language, the materials your kids are going to need, labeled in the target language, the I Can statements for the day in English (personal preference) and instructions for the Warm Up. You train the kids to come in, look at the Daily Slide and connect the supply words on the board to the supply words at the station. They form a line, get their supplies and papers for the day and sit down to do their Warm Up. Corner 4: La Pared de Estrellas 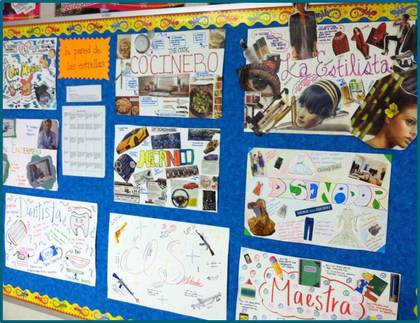 Student work is important to post in your classroom. I mean, everyone loves to see their name in lights! (And admin love to see proof you're actually doing something) Make sure that when you do put up work that it shows the best examples of what you asked for in the assignment. I also post the assignment description and the rubric I used for grading. That way, certain students can see why theirs isn’t up there, and the admin know what you were asking for. Corner 5: La Pared de Palabras 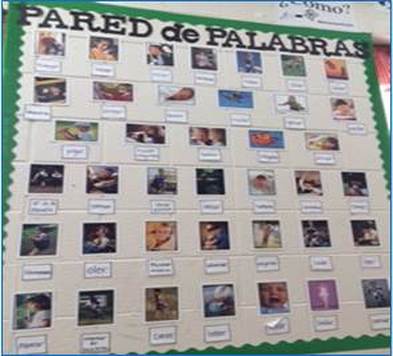 I use assorted Spanish verbs with pictures to represent them. No English translations. I wrote the Spanish word cards, and bought the picture cards at OfficeMax in the teacher area. I really love these word cards. I have another style of word wall (shown below) that uses our curriculum specific words organized by Unit with Clip Art pictures specific to the words. I made each Unit in a PowerPoint and printed out the slides in color and laminated them to use as the Word Wall. 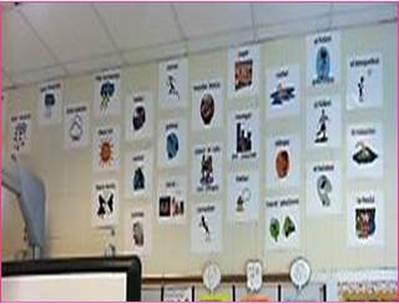 Corner 6: La Pared de la Cultura 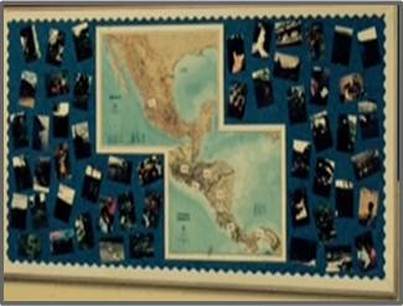 At the beginning of the year, before the students know any content, I use all pictures of culturally relevant places and maps for focus walls. I love using pictures of places I've actually been, because then I can tell them stories in down time moments about the pictures that they see all the time. Once they start learning content, and they are able to do some things in the language, they become responsible for the culture walls and I switch things around a bit. I choose a country each unit, and give them free reign to investigate their interests in that country, using language that they know to explain what they discovered. They must also print out a little picture to go with their discovery so that we can put it up on the wall.  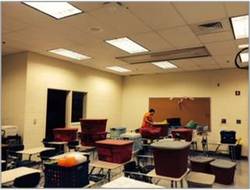 You know that overwhelming feeling when you walk into your classroom for the first time at the beginning of the year? You look at the empty space with its weirdly off-white walls, hang your head and walk back out because you can't face it. Where do you even begin? 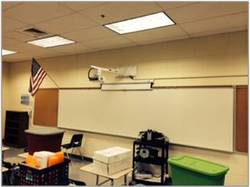 You are not alone, my friend. I have felt that way more times than I care to think about. It's not just when you change to a new school, but sometimes you just get moved out of your room on one hall because the admin needs that room for someone else (who knows why...). 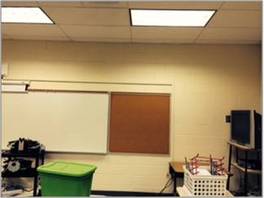 What I want you to know is that there is hope, and that it's 200% worth it to make your classroom into a haven that you and your students want to be in. I know it's overwhelming, and it will take work, but please believe me..It's worth the work. Here are a few pictures of how my classroom looks now.
 I love flags! I think they're beautiful and interesting and I incorporate them into my lessons about colors and numbers as well deeper cultural things. I have posters of Art, other Realia from Spanish-speaking countries, as well as Essential Structures information. 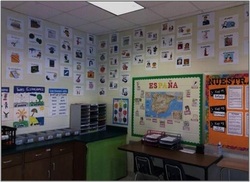 I love hearing my students say that it "feels" good in here and that the environment that I've created really helps them focus on and work with the language more. It's not super hard to do once you get a few key things in place in your room. 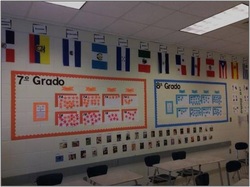 So, if you want to come with me on this little journey around my classroom, I'll show you each of the specific parts of my room, how I use each, and why I think they are so important to the teaching I get to do each day. Let's get to work!
|
|||||||||||||||||||